Wow, that was a real fight. You get quite a nice hard disk with the 2TB Samsung Spin Point EcoGreen F4 (bang-for-the-buck-wise). Unfortunately, patching the firmware is anything but a walk in the park. Here is the experience I could gather in the process – scraping all necessary information from different places on the net. (thanks pixelr0n1n for the hints on how to get this stuff done on a Mac Pro – see comment section below) So let’s get started:
- The drive has a firmware bug which causes the hard disk to just “forget” to write data if you enable the write cache (which you probably want to do) if there’s a SMART-command sent to the disk at the same time.
- On Samsung’s web page, there’s a tool to patch your disk up to the latest firmware. Sounds great and pretty easy. But:
- The old and the new firmware have exactly the same version number. I don’t know any procedure to tell a broken firmware from a good one – but to run a stress-test, e.g. copy a large file and issue a SMART-command, say using smartmontools. Do a byte-compare afterwards (the writes do not fail with an error, but silently screw up your data while [not] writing it to disk).
- If you have a disk manufactured after 12-2010, you can be sure that the firmware is ok. That date is printed on the disk label.
- That’s an FAQ: flashing the new firmware does not erase your data. However: If you used that disk already, you cannot be sure that all data on that disk is ok. Additionally, having a backup of your data never hurt anyone. Not having one did.
- You can write the firmware-update to a disk twice. No use, but possible.
- So go ahead and grab a FreeDOS-Iso (Update: Quadzilla posted a link to an ISO which already contains the Samsung tool!). Using isomaster (if you use Linux, it’s free – you can also modify the iso in a virtual machine), put the F4EG.EXE into the iso image. Just dump it into the top level of that image. You cannot easily put it into the FreeDOS floppy disk image, I tried that, because I ran into some nasty problems with the FreeDOS CD-ROM drivers. If you want to boot FreeDOS as a “Live CD”, it won’t easily recognize SATA-CD-ROMs. Or other brands of CD-ROMs. If you use the right mode while booting FreeDOS, that’s no problem. See below!
- Now, grab a PC (we Mac users have a problem here, you cannot use SATA-USB converters neither for flashing). The PC should not use any SATA-PATA emulation layer (if it does, you have to disable it in the BIOS settings, otherwise, F4EG will yield an “internal error” while flashing – and won’t write the firmware! I also came across a machine where you couldn’t disable this emulation – if you’re one of this lucky clan, look for a different PC).
- Now for the fun part:

-
- boot FreeDOS by choosing 1:

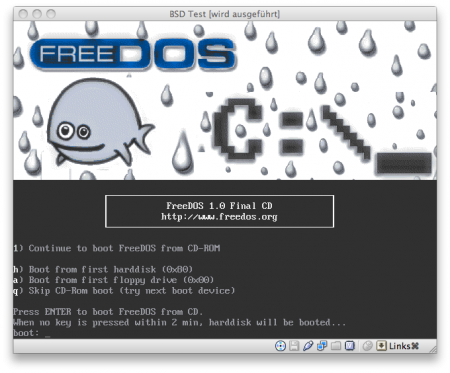
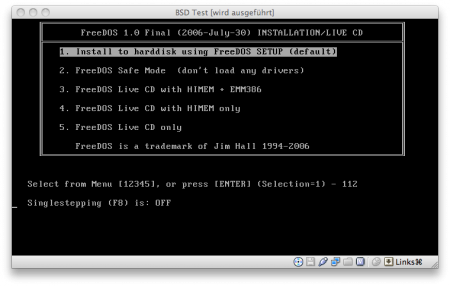
- Next, do not choose Live CD only, which might work if you have the right CD-ROM and FreeDOS supports it. Instead, choose “Install”, option 1:

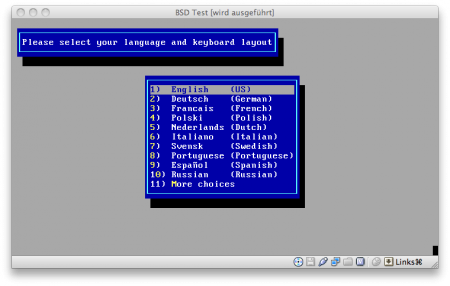
- Choose your language:

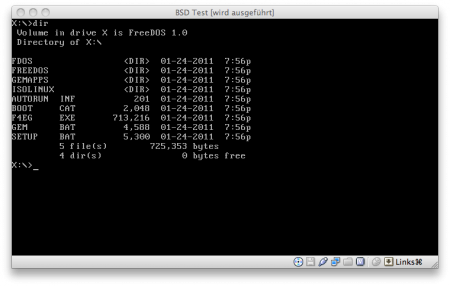
- …and next, chicken out to the prompt (before FreeDOS does something nasty with its fdisk). Now, your CD will be mounted as drive X:

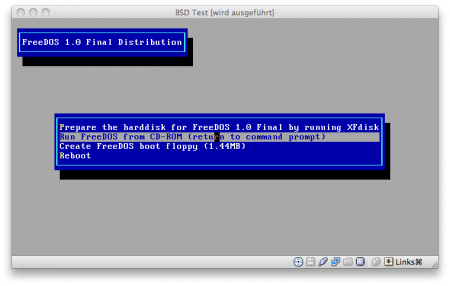
- Now, change to drive X: and launch F4EG. It will inform you when all went ok.

- Now: switch off your PC. If you just do a reset, you will not be running the new firmware!
Veeery easy. Yes. If you know what you have to do after what with which tool and with the right hardware… I hope this helps a few of you. If you feel as adventurous as I did when I bought the Samsung disks (which run fine now, btw!).