Category Archives: Nicht kategorisiert

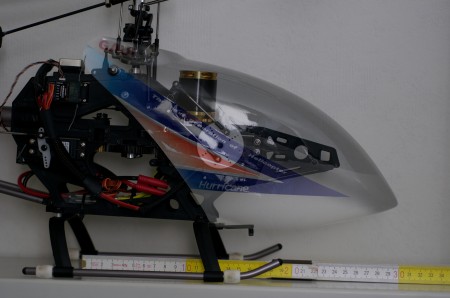
Gaui 425 “X-Ray image”

Here’s a picture of my  Gaui 425 – including a scale (cm), with and without canopy [the carbon version, not the cheapo one] as an “X-Ray image”.  Just in case that someone out there is (like me) currently trying to figure out which batteries might work for this bird. Special feature: 10 pixels in the image’s original size (download from here; 2,1 MB) roughly correspond to 1 mm.

Currently the only mod done is the canopy retaining bold which is mounted on a 2.5 mm plastic plate facing down. I will probably remove that altogether – if the battery’s big enough, it can’t slip anyway.

Samsung 2TB Ecogreen F4 HD204UI firmware-Upgrade

Wow, that was a real fight. You get quite a nice hard disk with the 2TB Samsung Spin Point EcoGreen F4 (bang-for-the-buck-wise). Unfortunately, patching the firmware is anything but a walk in the park. Here is the experience I could gather in the process – scraping all necessary information from different places on the net. (thanks pixelr0n1n for the hints on how to get this stuff done on a Mac Pro – see comment section below) So let’s get started:

  1. The drive has a firmware bug which causes the hard disk to just “forget” to write data if you enable the write cache (which you probably want to do) if there’s a SMART-command sent to the disk at the same time.
  2. On Samsung’s web page, there’s a tool to patch your disk up to the latest firmware. Sounds great and pretty easy. But:
    1. The old and the new firmware have exactly the same version number. I don’t know any procedure to tell a broken firmware from a good one – but to run a stress-test, e.g. copy a large file and issue a SMART-command, say using smartmontools. Do a byte-compare afterwards (the writes do not fail with an error, but silently screw up your data while [not] writing it to disk).
    2. If you have a disk manufactured after 12-2010, you can be sure that the firmware is ok. That date is printed on the disk label.
    3. That’s an FAQ: flashing the new firmware does not erase your data. However: If you used that disk already, you cannot be sure that all data on that disk is ok. Additionally, having a backup of your data never hurt anyone. Not having one did.
    4. You can write the firmware-update to a disk twice. No use, but possible.
  3. So go ahead and grab a FreeDOS-Iso (Update: Quadzilla posted a link to an ISO which already contains the Samsung tool!). Using isomaster (if you use  Linux, it’s free – you can also modify the iso in a virtual machine), put the F4EG.EXE into the iso image. Just dump it into the top level of that image. You cannot easily put it into the FreeDOS floppy disk image, I tried that, because I ran into some nasty problems with the FreeDOS CD-ROM drivers. If you want to boot FreeDOS as a “Live CD”, it won’t easily recognize SATA-CD-ROMs. Or other brands of CD-ROMs. If you use the right mode while booting FreeDOS, that’s no problem. See below!
  4. Now, grab a PC (we Mac users have a problem here, you cannot use SATA-USB converters neither for flashing). The PC should not use any SATA-PATA emulation layer (if it does, you have to disable it in the BIOS settings, otherwise, F4EG will yield an “internal error” while flashing – and won’t write the firmware! I also came across a machine where you couldn’t disable this emulation – if you’re one of this lucky clan, look for a different PC).
  5. Now for the fun part:

Updating Debian: Grub trouble

That was one of those: updates you should’ve skipped. Unless you have a spare, lazy Sunday afternoon. As I just did. The update itself was Lenny 6.0.3 in my case, but this seems to happen in different places at different times – YMMV. Anyway, the package tool apt-get asked me where it should install Grub – and that’s when I got suspicious. I could choose between sda, sdb, md1 or md2 – any regardless of my choice (even multiples selected), the result was a bit disappointing:

/usr/sbin/grub-setup: warn: This msdos-style partition label has no post-MBR gap; 
    embedding won't be possible!.
/usr/sbin/grub-setup: error: embedding is not possible, but this is required when 
    the root device is on a RAID array or LVM volume.

Just great. Aunt Google isn’t really helpful on this one, so here’s my little How-To.

Warning notice: please (pretty please) follow these instructions ONLY if you know what they mean. Any single command listed here is quite capable. Of messing up your whole system…

I had this scenario: RAID level 1 for /boot and / (and the swap partition. I know, that’s stupid, so let’s change that in the process, too). Here’s my config for reference:

cat /proc/mdstat 
Personalities : [raid0] [raid1] [raid6] [raid5] [raid4] 
md2 : active raid1 sda3[0] sdb3[1]
      726266432 blocks [2/2] [UU]

md1 : active raid1 sda2[0] sdb2[1]
      2104448 blocks [2/2] [UU]

md0 : active raid1 sda1[0] sdb1[1]
      4200896 blocks [2/2] [UU]

The single disks are configured identically like this:

I/O size (minimum/optimal): 512 bytes / 512 bytes
Disk identifier: 0x0004be32

   Device Boot      Start         End      Blocks   Id  System
/dev/sda1               1     8401994     4200997   fd  Linux raid autodetect
/dev/sda2         8401995    12611024     2104515   fd  Linux raid autodetect
/dev/sda3        12611025  1465144064   726266520   fd  Linux raid autodetect

…and that number “1” being the starting block of partition number 1 is the problem. However, I was really lucky: md0 consists of sda1 and sdb1, and md0 only holds my swap partition. So we have to change that one so that it starts “higher” than block 1. Let’s go:

swapoff -a
mdadm --stop /dev/md0
fdisk /dev/sda

…and tinker with partition 1: delete (d, 1), re-create (n, p, 1, 63, [enter your maximum size here]), change type (t, 1, fd), write back (w). If you like, do the same with disk sdb (if you think it’s more aesthetically pleasing to have the RAID partitions the same size for example). Next, reassemble the RAID, this time using RAID-level 0 (striping) for swap (why shouldn’t we?):

mdadm --create /dev/md0 --level=0 --raid-devices=2 /dev/sda1 /dev/sdb1

And: beam me up, Scotty:

mkswap /dev/md0

accompanied by a:

swapon -a

That’s about it. Please don’t forget to re-setup Grub – hopefully without error messages this time. If you do forget, your next reboot might be a bit messy… ;-)

Big thanks goes to the folks over at the Hetzner-forums – they had the solution (but inaccessible for Google, that’s why I put it here).
Aperture Places

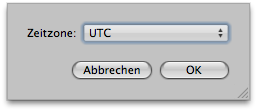
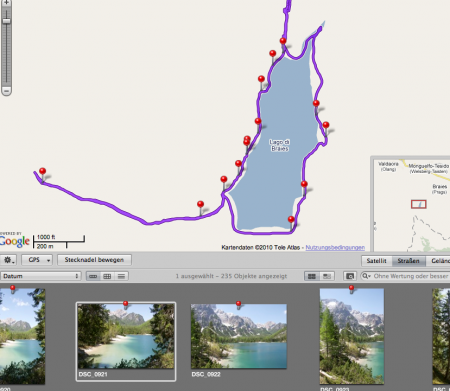
Having returned from our trip to South Tyrol, I grabbed my GPS tracks off my Columbus V900, piped them through GPS Babel and loaded them into Aperture. After placing the first photo on the track to set the time offset, I was shocked. All images were misplaced, some images did not receive GPS coordinates at all… something very strange was going on. After a odyssey through the Internet (where I stumbled across BT747, a nice program to convert track formats), countless conversions from one format to another (via a third format), which all lead to the same crappy result, I found out what was the problem: the time zone which Aperture quietly assumes the track files have. One click here:

…and (amlost) everything was ok – if you place the cursor over a different zone before clicking „ok“, Aperture will also notice that it should apply the changes. Very buggy behavior indeed – and since last time the GPS placement worked fine (which was before daylight savings time), there’s a major bug on the loose here. Here’s the workflow I had to use:

  1. convert Columbus-CSV-files to  GPX (use whatever you like most here, BT747, GPS Babel or anything else but TimeAlbum which causes Aperture to crash repeatably)
  2. Read track into Aperture
  3. Set track time zone to UTC
  4. Place first photo (Caution: use the correct offset to UTC here – in my case, that was MESZ-UTC= -60 min.)
  5. Let Aperture place the rest of the photos along your track.

Blender 2.6: “remove doubles” for all objects

One of those “Google-holes”: you’re searching for something – and find nothing. So let’s fix this (and for me, it’s where I can find it again, kind of a web-clipboard).

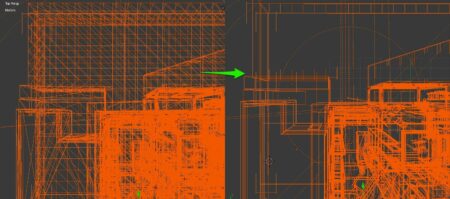
Here’s the problem: Working with Blender, I imported a 3D scene from another program. After a few clicks, I realize that all vertices are duplicated (Collada import, and no way to change the export settings). Select, toggle edit mode, “remove doubles”, “recalculate normals” would be a valid approach for 10 meshes. But suppose you end up with several 100s? Right, there’s Blender’s built-in Python interpreter. So fire it up an any Blender window you like using the little button on the bottom left:

…and paste the following into that window (you might have to add one press of the return key). The script only works on the selected meshes (and ignores non-meshes), which makes it easier for really huge scenes – you might want to select only a few of them to get started, because Blender will be inresponsive during the script doing its job:

import bpy
if bpy.context.selected_objects != []:
	for ob in bpy.context.selected_objects:
		if ob.type == 'MESH':
			bpy.context.scene.objects.active = ob 
			bpy.ops.object.mode_set(mode='EDIT') 
			bpy.ops.mesh.select_all() 
			# remove doubles:
			bpy.ops.mesh.remove_doubles() 
			# recalculate outside normals:
			bpy.ops.mesh.normals_make_consistent(inside=False)
			bpy.ops.object.mode_set(mode='OBJECT')